Wildlife Pond in a Small Garden: How to Do It Affordably
As an Amazon Associate I earn from qualifying purchases and sometimes recommend products from other sellers at no extra cost you. For more details see my disclosure policy and privacy policy.
I used to think a wildlife pond needed a big garden, a digger, and a free weekend in March. Then last spring I shoved a second-hand Belfast sink into the shadiest corner of my narrow Edinburgh terrace garden, filled it with rainwater and a handful of pond plants from the local garden centre, and by July I had frogs. Actual frogs.
A wildlife pond is one of the highest-impact things you can do for garden biodiversity — the RSPB rates it as the single best habitat feature you can add. It does not have to be large, expensive, or complicated. This guide covers everything you need to know to build one in a small UK garden, from around £20, this season.
Why a Wildlife Pond Is Worth It — Even in a Tiny Garden
Fresh water is the scarcest resource in most UK suburban gardens. Over 70% of ponds in the UK were lost in the twentieth century, which means every garden pond — even a container the size of a washing-up bowl — genuinely matters to local wildlife.
Within one to two seasons of creating a pond, you can reasonably expect:
Free download
Get the Non‑Toxic Home Audit Checklist
A room‑by‑room checklist to help you spot what’s worth swapping in your home — and what’s not worth worrying about. Join the fortnightly newsletter and it’s yours.
No spam, unsubscribe any time.
- Frogs and toads arriving to breed (they find water by smell and sound, not by invitation)
- Dragonflies and damselflies using the water surface to hunt and lay eggs
- Hedgehogs, birds, and foxes drinking from the shallow edges
- A range of aquatic invertebrates — water boatmen, pond skaters, diving beetles — establishing naturally within weeks
- A knock-on increase in general garden biodiversity as the food web builds
None of this requires a large pond. It requires a permanent body of water with at least one shallow edge that wildlife can access safely.
Choosing Your Approach: Dug Pond vs. Container Pond
For a small garden, you have two realistic options:
Option 1: A Container Pond (from £20)
This is the right choice if you have a patio or yard rather than borders, if you rent and cannot dig, or if you simply want results quickly with minimal effort. Any watertight container works: a Belfast sink, a wooden half-barrel lined with butyl liner, a large ceramic pot sealed at the drainage hole, a galvanised water trough, or even a large plastic trug.
Pros: cheap, portable, no digging, works on hard surfaces, can be positioned anywhere including a balcony.
Cons: smaller volume means temperature fluctuates more; frogs and newts are less likely to breed (though they will still visit and drink); needs more maintenance in summer to top up evaporation.
Option 2: An In-Ground Pond (from £40–£80)
A dug pond — even one that is only a metre across and 40–50cm at its deepest — will attract breeding frogs and toads within one to two years. The greater volume keeps the water temperature more stable and creates more diverse habitat zones.
Pros: more stable water temperature, better for breeding amphibians, lower summer maintenance, looks more naturalistic.
Cons: requires digging, needs butyl or EPDM liner, more planning required around depth and shelving.
For most small gardens, a combination works well: start with a container pond this season while you plan where an in-ground pond might go next year. This guide covers both.
What You Actually Need: A No-Fuss Shopping List
For a Container Pond (budget: £20–£50)
- A watertight container — minimum 40–60 litres. A half-barrel from a garden centre costs £15–£25; a second-hand Belfast sink from a reclamation yard or Facebook Marketplace can be free to £10.
- Aquatic compost and/or gravel — aquatic baskets filled with proper aquatic compost keep plants healthier than ordinary compost, which leaches nutrients and causes algae. A small bag costs £5–£8.
- One to three native aquatic plants (see plant list below)
- Stones, bricks, or pebbles to create a ramp and shallow area
- Rainwater — ideally collected from a water butt. Tap water can be used but leave it to stand for 24 hours and expect more algae initially.
For an In-Ground Pond (budget: £40–£100)
- Butyl or EPDM rubber liner — this is the most important investment. Buy quality; cheap liner degrades. For a 1m x 1.5m pond with 50cm depth, you need approximately 4m x 4.5m of liner. Butyl liner (0.75mm) costs around £3–£5 per square metre from pond suppliers. Avoid polythene — it punctures and degrades within a couple of seasons.
- Sand or old carpet underlay as a protective layer beneath the liner
- Bricks or stones to edge and weight the liner
- Aquatic planting baskets and compost
- Native pond plants (four to six species for an in-ground pond)
One thing you do not need: a pump, filter, or electricity supply. A wildlife pond is not a fish pond. It should be left to balance itself, and adding a pump or chemicals will undermine the ecology you are trying to create.
Building a Container Pond: Step by Step
This takes around two hours and no specialist tools.
- Choose your container and position. Place it where it will get around four to six hours of sun per day — enough for plants to grow, but not so much that the water overheats. Part shade is fine and often better for small containers.
- Seal any drainage holes. For ceramic pots, use a bung and waterproof sealant. For wooden barrels, soak the barrel overnight first — the wood swells and often self-seals, but add a rubber bung for certainty.
- Create a depth gradient. Stack bricks or flat stones inside the container to create a shallow ledge at one end. Aim for at least one area that is 5–10cm deep — this is where wildlife will access the water.
- Add a ramp or log. Place a rough-surfaced stone, piece of bark, or section of branch at an angle against the side of the container. Hedgehogs and frogs need to be able to climb out as well as in. This is not optional — animals drown in garden ponds every year because they cannot escape.
- Plant up. Place your aquatic planting baskets on the brick ledges at the right depth for each plant (see labels — depths vary). Use aquatic compost, top with gravel to prevent it washing out.
- Fill with water. Rainwater is best. If using tap water, let it stand for 24 hours. Fill slowly over the plants.
- Wait. Resist the urge to add anything else. Do not add fish. Do not buy frogspawn or tadpoles. Wildlife will arrive.
Native Plants to Use: What Actually Works in UK Ponds
Use only native UK species or proven non-invasives. Several popular pond plants — floating pennywort, water primrose, and parrot’s feather — are legally restricted or banned in the UK because they escape into waterways and cause serious ecological damage. Stick to these:
For a Container Pond (choose two to three)
- Water forget-me-not (Myosotis scorpioides) — shallow marginal, spreads beautifully, flowers May–September. Bees love it.
- Marsh marigold (Caltha palustris) — bold yellow flowers in early spring, excellent for pollinators. Plant at 0–10cm depth.
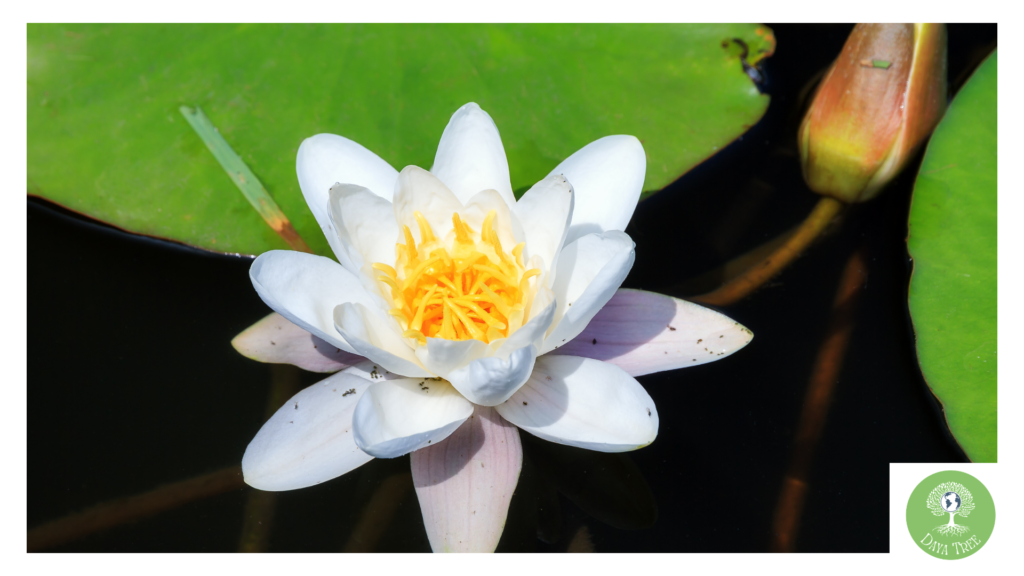
- Miniature water lily (Nymphaea ‘Pygmaea Alba’ or similar) — provides surface cover to reduce algae and shelter for tadpoles. Choose a variety rated for small ponds.
- Water mint (Mentha aquatica) — marginal, spreads vigorously (keep in a basket), smells wonderful, attracts bees and hoverflies.
- Brooklime (Veronica beccabunga) — fast-growing, native, oxygenating. Plant at 0–20cm depth.
For an In-Ground Pond (choose four to six)
All of the above, plus:
- Yellow flag iris (Iris pseudacorus) — architectural, native, plant at 10–15cm depth. Can spread vigorously so keep in a basket.
- Water crowfoot (Ranunculus aquatilis) — fully submerged oxygenator, white flowers in spring. Plant directly on the pond base.
- Hornwort (Ceratophyllum demersum) — excellent oxygenator, fully submerged, no planting required — just drop it in.
- Purple loosestrife (Lythrum salicaria) — striking purple flowers July–September, plant at the edge or in damp soil beside the pond.
Where to buy: Thompson & Morgan and Sarah Raven both sell native pond plants online with clear planting depth guidance. Local wildlife trusts and RHS plant fairs often sell bare-root native aquatics in spring at lower prices than garden centres.
Realistic Expectations: What Will Actually Visit Your Pond
UK wildlife finds ponds primarily by scent, moisture gradient, and luck. You cannot force arrival — you can only create the right conditions and wait. In my experience, this is roughly what to expect:
Within days: Pond skaters, water boatmen, and other aquatic invertebrates will often arrive seemingly from nowhere. These colonisers are flying species that locate water from the air.
Within weeks: Birds will begin using the shallow edge to drink and bathe. Hoverflies will visit the surface. If you have aquatic plants in flower, bees will follow.
Within one season: Dragonflies and damselflies will hunt over the water and may lay eggs. Frogs and toads will investigate — especially if there are established ponds nearby.
Year two onwards: If you have amphibians in the local area, breeding is likely once the pond is established and well-planted. Frogspawn usually appears in February–March. A container pond is less likely to attract breeding amphibians than an in-ground pond, but it does happen.
Important note on frogs and frogspawn: Do not buy frogspawn or move it from another pond. This is actually illegal under the Wildlife and Countryside Act 1981 and risks spreading disease. Let frogs find your pond in their own time — in most UK gardens with established amphibian populations nearby, they will.
Year-Round Maintenance: Honestly Not That Much
A wildlife pond is designed to be low-maintenance — the ecology looks after itself once established. The main tasks are:
Spring (March–May)
- Check the pond edge after frost for any damage or subsidence.
- Remove blanket weed by hand if it is choking plants — a small amount is normal and harmless.
- Do not clean out the pond in spring if there is frogspawn or tadpoles present. Wait until late autumn.
Summer (June–August)
- Top up the water level with rainwater as evaporation increases — particularly important for container ponds.
- Thin out plants if they are covering more than half the water surface (this shades out submerged plants).
- Leave algae on the edges — it is a food source for invertebrates.
Autumn (September–November)
- Net the pond in October if there are large deciduous trees nearby — decomposing leaves lower oxygen levels and can harm amphibians overwintering in the mud.
- Cut back dead vegetation, but leave some hollow stems for overwintering insects.
- This is the right time for a partial clean-out if needed — scoop out excess silt and leave it on the pond edge overnight so any invertebrates can return to the water.
Winter (December–February)
- Never break ice on a frozen pond with force — the shockwave can stun or kill hibernating amphibians. Instead, place a pan of hot water on the ice surface to melt a small hole, or simply leave it (small ponds rarely freeze solid).
- Container ponds are more at risk of freezing solid. Move smaller containers to a sheltered spot, or wrap them in bubble wrap or hessian.
Making It Work in the Smallest Spaces
If you have less than two square metres of garden, or a patio or balcony, you can still have a meaningful wildlife water feature:
- A large ceramic pot (sealed at the base) on a patio will attract drinking birds and invertebrates immediately.
- A shallow tray or saucer of water on a wall or raised surface counts as a bird bath and a water source for insects — even this small gesture is genuinely useful.
- A half-barrel on a balcony with water mint, forget-me-not, and a floating wooden raft for wildlife to access will attract dragonflies and hoverflies in the right location.
- If you have a shared communal garden, raising a pond project with neighbours means a shared cost and a much larger ecological impact — one proper 2m x 1m pond supports far more wildlife than five container ponds.
The Short Version
A wildlife pond in a small UK garden does not require a large budget, specialist knowledge, or much time. It requires a watertight container or a hole in the ground, some native plants, rainwater, and a shallow edge that wildlife can access safely. Within a season, something will find it. Within two seasons, your garden will be measurably wilder.
Start with the container approach if you are unsure. A half-barrel, three native plants, and a handful of pebbles. That is it. The rest follows.
Related reading: The Complete Guide to Rewilding Your UK Garden (2026), No-Mow May: What It Is and Why It Matters | UK Native Plants for Pollinators | Log Piles, Bug Hotels, and Leaf Piles: A DIY Guide to Garden Wildlife Habitat